Summary

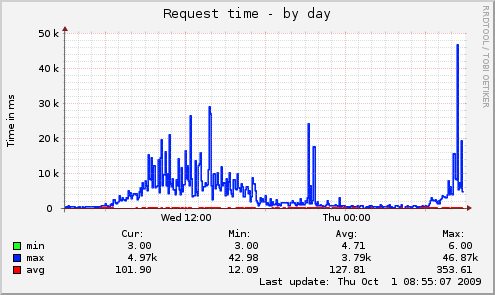
I used RRD (round robin database) this summer on a project. This was the first time I used RRD directly, but I had run across it indirectly in the past as part of Munin. The Munin project collects, stores, and graphically displays just about any type of numeric value. The output graphs are very recognizable. And the plugin framework for adding new data sources makes Munin incredibly easy to script.
The only problem I ran into when I first came across RRD and Munin in 2008 is I didn't understand how either of them worked. This post wont go into the use of RRD files -- I'll save that for another later post -- but I wanted to document how I recently got Munin installed, configured, and working on Ubuntu.
How to install Munin
At the time I wrote this post, the lastest version of Munin was v2.0.17. The Ubuntu repo for Ubuntu 13.10 has exactly that version. If you are using an earlier version of Ubuntu, there is a PPA that can help.
sudo add-apt-repository ppa:tuxpoldo/munin
sudo apt-get update
There are many optional components and plugins for Munin. For example, I often work with PostgreSQL, so the libdbd-pg-perl package is useful to me so Munin can gather information on my databases. At a bare minimum, you'll want to install apache2 and munin. The command I use to install Munin is this one:
sudo apt-get install apache2 munin munin-plugins-extra libcgi-fast-perl libapache2-mod-fcgid libwww-perl acpi smartmontools lm-sensors ethtool fancontrol sensord libdbd-pg-perl
How to configure Munin plugins
Many Munin plugins are enabled by default when Munin is first installed. To see the full list of plugins, run this command:
munin-node-configure
That same command can also be used to recommend additional plugins that can be enabled, based on what software packages have been installed. Run this command:
sudo munin-node-configure --suggest --families auto,manual,contrib,snmpauto
This will display an additional "Suggestions" column to show what plugins could be enabled. Note that at this point, no changes have been done to the Munin plugins. The output should look something like this:
To enable a plugin, a symlink must be created in the directory /etc/munin/plugins. The munin-node-configure tool can be used to automatically create the necessary symlink, or you can manually create them yourself. If you'd like to accept all the suggestions that Munin has made, run this command to create the necessary symlinks:
sudo bash -c "munin-node-configure --suggest --families auto,manual,contrib,snmpauto --shell | sh"
If on the other hand you want to manually create a subset of the recommendations, use this command as a guide:
sudo munin-node-configure --suggest --families auto,manual,contrib,snmpauto --shell
Neither Munin nor Munin-node watches the configuration files for changes, so if you've enabled some new plugins or changed the Munin configuration in any way, run this command:
sudo /etc/init.d/munin-node restart
Viewing the Munin output
Munin runs every 300 seconds (5 minutes). This means when you first install it, none of the output will be visible until 1 collection period has finished and Munin generates the output files. Be patient!
When Munin eventually runs, the output is stored in /var/cache/munin/www/. Note that by default, the Munin data is only available through Apache when connecting through the loopback interface -- 127.0.0.1 or ::1. To see the Munin output, browse to http://localhost/munin/.
The address (and many other settings) can be modified by editing /etc/munin/*.conf. Remember to restart munin-node if you make a configuration change.
Changes needed if using Apache 2.4
Apache v2.4 (versus v2.2) has made a change which affects /etc/munin/apache.conf. Note that starting with Ubuntu 13.10, the default version of Apache is v2.4. The Apache configuration commands Order and Allow no longer exist, both having been replaced with Require.
If if browsing to http://localhost/munin/ continuously results in this error message:
Forbidden You don't have permission to access /munin on this server.
...check to see if you are using Apache v2.4. If so, edit the file /etc/munin/apache.conf and change the 4 instances of these two lines:
Order allow, denyTo this:
Allow from all
Require all granted
This example gives very open permissions to /munin/. If you don't want to grant full permissions, see the Apache2 documentation for Require. For example, Require ip 192.168.1.0/24.
